Showing posts with label howto. Show all posts
Wednesday, March 9, 2016
[HOWTO] Automatically adjust adaptive brightness based on time/dawn/dusk (root required, sadly)
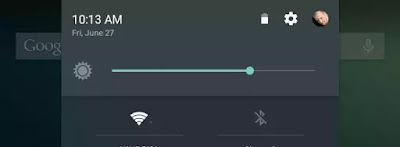
One of those options is that, besides the actual color temperature and amount of red, blue and green, it lets you configure the display brightness for when it's day, evening and night. But that's exactly where I ran into a bit of trouble because I use Android's Adaptive Display feature (the one that lets you set the display brightness but still gives the system some room to maneuver based on the amount of light the device detects in your surroundings). The problem is that apps can only set the system brightness when Adaptive Brightness is disabled. Which is stupid.
Luckily, Tasker comes to the rescue.
I'm not going into a lot of detail about what Tasker is and what it does and-so-on but lets keep it at this: Tasker lets you configure certain rules (called 'profiles') and do things (called 'tasks') based on those rules. And there are a LOT of plugins available for it, extending its not-so-limited standard feature set even more.
I found out that Android actually does provide for a "settings key" to change the brightness when the Adaptive Brightness feature is enabled[1]: "screen_auto_brightness_adj". And you can use that key by running a shell command with Tasker.
Now, you could of course just set a time and run the command based on that but - in most parts of the world - the sun doesn't come up and goes down at the same time of the day. Here's where the Tasker plugin Twilight comes to the rescue. It lets you create rules based on your location's dawn and dusk times!
So just a quick rundown (I'll update this section later but it's getting late right now so this'll have to do for now):
- Open Tasker and create a new profile > State
- Search for twilight, tap it and then the 'pen' icon
- Choose your from/until and confirm
- Create a new task, give it a useful name ("Brightness Night" or something)
- Add a command, search for "run shell"
- Paste "settings put system screen_auto_brightness_adj [value]" where [value] is between -1 and 1.
- Don't forget to check the 'run as root' option or it won't work.
- Confirm everything and in the Profile section of Tasker longpress the task you just created and choose "Add exit task"
- Create a new task, name it "Brightness Day" and repeat step 6 and 7 but now with the brightness value you want to use during daylight.
- Done! Keep pressing 'back' until Tasker exits (this is important, it seems Tasker doesn't actually save things until you do this!)
Wednesday, December 16, 2015
Dailygadellaa: The Making Of...

Although I know how to work with a wacom I prefer to use pen and paper so we start out with exactly that.


- Punch
- Border (with smallest thickness)
- Exposure (+50)
- Black and white (+50)
- Save
- Share
Done!
Monday, November 30, 2015
[HOWTO] Raspi tricks: reboot your router every so often

This little guide will show you how I've set up my Raspi to reset my router every day (it's a long story but one of my routers is very unstable in its current set up and I haven't figured out how to fix it yet).
UPDATE:
I forgot to mention which router I use this script for. It's a ASUS RT N66U.
As Jeroen pointed out in the comments it can be a bit more complicated if you use other routers. If you have a Fritz!box (xs4all tends to supply these as modems/routers) you are in luck:
https://github.com/jpluimers/bash-fritzclient
REQUIREMENTS
- A raspberry pi
- A router with telnet access
- Some basic knowledge of linux, bash and cron jobs
LET'S GO!
First you probably need to install telnet:
#install telnet
sudo apt-get install telnet
Now you have telnet give it a try and log in with your router
#create a connection
telnet [ip-of-router]
You should be prompted for your username and password. Once you provided these, try the reboot command:
#reboot router
reboot
If this is all working we can move on to the next step: create a little bash script that runs a bunch of commands. It doesn't really matter where you put it but I like to have it in /home/pi/scripts/
#create directory
mkdir ~/scripts
#create file
nano ~/scripts/cronjob-router-reboot.sh
Paste the following script
#!/bin/sh
# replace cmd1 for the command to execute
host=192.168.0.179
port=23
user=YOURUSERNAME
pass=YOURPASSWORD
cmd1='reboot'
rm -f /home/pi/scripts/log-cronjob-router-reboot.txt
( echo open ${host}
sleep 2
echo ${user}
sleep 1
echo ${pass}
sleep 1
echo ${cmd1}
sleep 1
echo quit
sleep 2
) | /usr/bin/telnet > home/pi/scripts/log-cronjob-router-reboot.txt
You do need to edit the 'host', 'user' and 'pass' values at the top :). Press Ctrl+X, Y and then ENTER to save the file and exit.
Now make the file executable:
#make executable
chmod +x cronjob-router-reboot.sh
And try it out!
# run script
/home/pi/scripts/cronjob-router-reboot.sh
The last thing we need to do now is add it as a cron job. Cron, in case you don't know, is like Windows' Task Scheduler: it lets you run things at a given time and/or interval.
#open crontab
crontab -e
At the bottom, paste the following to start the job every day at 4:00 in the morning (see the text for a short description of that the first 5 characters do and how you can use them to schedule things)
0 4 * * * /home/pi/scripts/cronjob-router-reboot.sh
That's it! Save it and exit. Your raspberry should now reboot your router every day at 4:00 AM :D
Sunday, November 29, 2015
[HOWTO] Viper4Android

I've been looking into audio boosters for Android and in my search I stumbled upon Viper4Android. It's pretty awesome but requires a bunch of installation steps and I found the documentation a bit incomplete and/or confusing - so much that, at some point, I found myself holding a (soft)bricked device. So here's what I did to get it to work.
NOTES
This guide is based on the steps I had to follow to get everything working on my Moto X 2013 running the official, stock Moto Android 5.1 rom. The actual (system version) version is 222.27.5.ghost_row.O2.en.DE.If you have any further tips or if you think I forgot something: give me a shout in the comments
REQUIREMENTS
- A rooted device with SuperSu (or a similar app) and BusyBox installed
- The Viper4Android FX (just download the zip, we'll cover its contents later)
- SELinux Mode Changer (not available through the Play Store because Google does not approve)
- A "root file explorer" like ES File Explorer or Root Explorer (I prefer the latter)
Recommended:
- USB debugging enabled (on the device)
- ADB installed on a pc
- An usb cable to connect the device with a pc
INSTALLATION
1. Make sure you are rooted, have SuperSU and Busybox installed
From what I've found it should not matter which busybox installer you use but it is recommended to use the app by 'Stephen (Stericson)' (which is linked above).
A note on SuperSU: If the driver won't install and says something about an incorrect or missing busybox installation: open the SuperSU app, go to settings and uncheck "Mount namespace separation". This further compromises the security of your device so you may want to try if disabling it is possible after installing the Viper driver (which we'll do a bit later on in this guide).
From what I've found it should not matter which busybox installer you use but it is recommended to use the app by 'Stephen (Stericson)' (which is linked above).
A note on SuperSU: If the driver won't install and says something about an incorrect or missing busybox installation: open the SuperSU app, go to settings and uncheck "Mount namespace separation". This further compromises the security of your device so you may want to try if disabling it is possible after installing the Viper driver (which we'll do a bit later on in this guide).
2. Open SELinux Mode Changer and set it to permissive
WARNING: this *does* somewhat compromise Android's ability to keep you safe from malicious software
You need to reboot your device now (if I remember correctly).
3. Now we need to modify a system file called build.prop
WARNING: this is the step where I messed up and almost bricked my device. Fortunately my mistake was fixed pretty easily but that's because I have some basic linux experience. If you don't, you'll probably still manage to perform the same fix but it may be a lot more abracadabra (read: you'll probably have NO idea what you're doing and thus risk even more damage).
- I STRONGLY recommend you make a backup using TWRP or CWM recovery so you can roll back any changes in case something goes awry. Another thing you might do is just create a backup of the build.prop file (copy it, paste it somewhere else)
- Open ES File Explorer or Root Explorer and navigate to /system
- Find the file called build.prop
- Edit the file by..
- ...opening it with a basic text editor on your device
- ...or send it to a pc via Dropbox, Drive, Pushbullet, etc and edit it there, then send it back to the device and copy it over the existing file
- You should get a dialog asking you if you want to change the permission on the file so you can overwrite it. You need this so do it. BUT DON'T FORGET TO CHANGE IT BACK once you're done. The numeric permission notation should say '0644' which is 'rw-r--r--'.
Here's what you need to change:
“Ipa.decode=true” to “lpa.decode=false”
“tunnel.decode=true” to “tunnel.decode=false”
“lpa.use-stagefright=true” to “lpa.use-stagefright=false”
If you can't find one (or more) of these properties: don't worry, in that case you don't need to change it :) Once you've finished editing it DO NOT FORGET to change the permissions back to read-only!!!
IF you forgot to restore the permission of the file you may follow this guide to fix it:
http://forum.xda-developers.com/showthread.php?t=1927198
IF you forgot to restore the permission of the file you may follow this guide to fix it:
http://forum.xda-developers.com/showthread.php?t=1927198
4. Unzip the Viper4Android FX zipfile and copy the correct apk file to your device.
Note: 2.3 for Android 2.3 and 4.x if you're running Android 4.0 or higher
5. Install the apk file and run the app
When asked for root access: grant it.
6. Install driver, select 'Power saver' driver mode and reboot
V4A needs to install a driver to work so this is the first step. After that it should show you three modes in which it can run. Choose the battery friendly one for now - you can change it later.
Don't forget to reboot your device.
7. Once rebooted, open V4A and check if it works...
Tap the overflow icon (the three dots in the upper right corner) and check if everything is working properly by going to Driver Status. It should say something like:
- Driver version ...
- NEON Enabled: Yes
- Enabled: ...
- Status: Normal
- Audio Format: Supported
8. And then check if it really works...
I recommend going to the headphone tab, enabling V4A at the top, then the Equalizer and select a preset. The change should be audible pretty much immediately.
If you're not sure what all the settings do you should have a look at this page:
http://vipersaudio.com/blog/?page_id=43
You're done! Unless it's...
9. ...not working..?
Have a look at the official troubleshooting guide
ACKNOWLEDGEMENTS
An excellent guide on Reddit:
And of course the installation guide on the official Viper Audio website:
Subscribe to:
Posts
(
Atom
)

